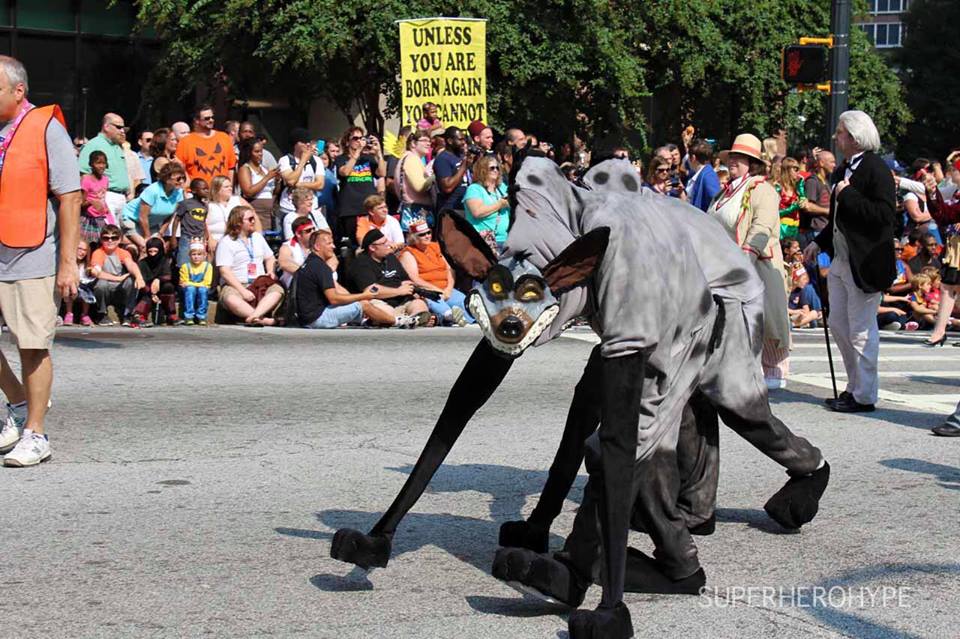
Mufasa! Mufasa! Mufasa!
The Lion King
For
the most part, this mask-making process was one great big experiment.
Luckily, it worked out! Our initial idea involved sculpting the masks
out of clay, covering the clay in vaseline, doing plaster of paris over
the clay, and then somehow just pulling the dried plaster off while
retaining the shape. Yeah, that didn't work. After failing miserably
at our plaster attempt after sculpting the Banzai mask, we regrouped and
started looking into other options. Ultimately, we settled on Worbla,
which comes in sheets and becomes mold-able when heated.
The
biggest concern after we got the worbla was how we were going to heat
it and press it into the correct form without melting the clay.
Obviously, the easiest solution to this problem is to get clay that
doesn't melt, but we had already sculpted the whole thing out of clay
which, as it turned out, did melt. Based on the fact that we had more
problems with applying the worbla to the Shenzi mask, I would say that
if for some reason you decide you want a challenge and go for clay that
will melt, coating the clay in vaseline first helps tremendously (and
this vaseline layer has other uses too, so we recommend using it no
matter the clay you use).
 |
| Putting the worbla on the Banzai form |
To apply the worbla, you just need a heat gun. We folded the worbla in half and heated it all up before getting to the application because one side of the sheet had an adhesive, and by "gluing" the two sides together, we ended up with a sturdier end-product. If you were just putting the worbla onto a foam base (for armor or something like that), you wouldn't need to go through that extra step. Once the two sides were put together, we just heated it up and molded it onto the clay as best we could. Application of the worbla ended up being a bit tricky, just due to the
weirdly-shaped mask, but other than a few seams and a few misplaced
wrinkles, we were really pleased with the end result.
 |
| Worbla applied to Banzai form |
Once the worbla was molded onto the clay, we used a spray primer to coat the whole thing. We were hoping that this would help cover up the seams, but as it turned out we needed some additional work to mask those.
 |
| Primered Banzai mask |
Once the mask was sprayed with primer and dry, we got to work digging the clay out. Once again, we learned that a vaseline layer over he clay was helpful here. The clay came out of the Banzai mask much more easily than it came out of the Shenzi mask. Once we had the Banzai mask all molded and spray-primered, we got to work on the Shenzi mask. The process was basically the same, although we had quite a bit more trouble with melting, and ended up basically losing the entire sculpt on the left eye. To fix it, we ended up with applying worbla on top in the shape we had originally sculpted. I wasn't 100% thrilled with the result, but it ended up working out and looking fine once all of the paint was applied.
 |
| Side view of Shenzi sculpt |
|
|
 |
| Shenzi sculpt |
 |
| Worbla on Shenzi, Banzai covered in primer |
 |
| Primer applied to Shenzi |
Once we got both of the masks coated in primer and realized that the seams were still pretty visible, we purchased a jar of modeling paste, which let us fill in the seams and then sand the dried paste down to create a smooth form.
 |
| To help us cover, up the seams |
 |
| Seams covered in Liquitex |
 |
| Seams covered in Liquitex |
 |
| Sanded Liquitex |
 |
| Sanded Liquitex |
There were, admittedly, still some errant wrinkles on the lips after the molding paste was applied, but we were sufficiently happy (and not sure how fixable they were) and decided to move forward with the paint job. For painting, we used createx airbrush paints, and mixed together black and white to create our desired shade of gray. We settled on the createx because it also works on fabric, and we wanted to be able to color-match our body-suits to our masks. We opted to go a hair lighter than the hyenas were in the movie, just because we figured the features and other paint would stand out more in person if we weren't a super dark gray.
 |
| Airbrushing Banzai |
|
 |
| Masks drying after getting their first coat of gray |
 |
| Faces being painted |
Once we got the masks painted, we added on the final touches of teeth and hair. For the teeth, we just used foam strips, which we hot glued into the mouths and then carved to look like teeth. Once the carving was done, we added white paint to the foam to make the teeth pop. For the hair, we used roving wool, which I simply rolled and then hot glued to the masks. For Shenzi, we just needed the forelock. Banzai needed a tuft on top of the head and some bushy eyebrows.
 |
| Finished Shenzi Mask! |
 |
| Banzai nearly finished, just needs his eyebrows in this one |
 |
| Add caption |
 |
| Finished Banzai mask! |